How to Enable or Disable a Layered Navigation Attribute
This article describes how to enable or disable a Layered Navigation Attribute on your Catalog Pages. Layered Navigation adds the attributes on the side of the catalog pages that products can be filtered by such as price, brand, and other attributes.
Enabling an attribute for Layered Navigation will ONLYwork for attributes with the input types: Yes/No,Dropdown,Multiple SelectandPrice
Step-by-step guide
- Login to the Admin Panel at your store management URL. This will be located at the store website addresswith a /manage after it.
For example, example.com/manageor shop.example.com/manage. - Go toStores>Attributes>Product:
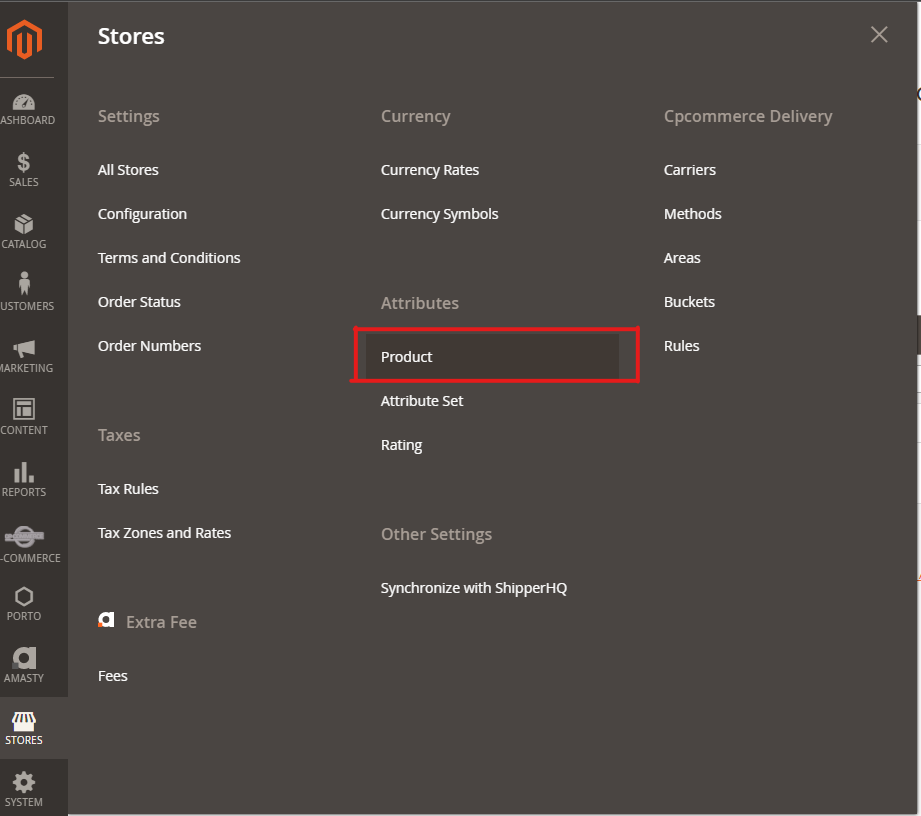
You should now see the following information:
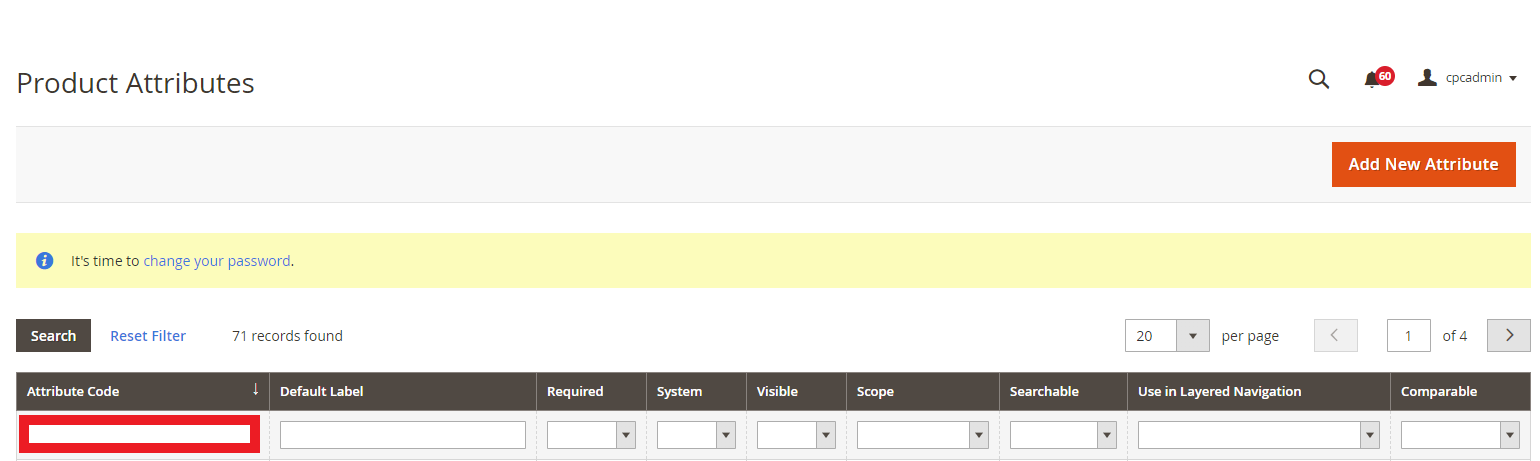
In the field I have surrounded in red, enter the name of attribute you are looking for and then press Enter on the keyboard. As an example, I have searched forprice.If you are unsure what attribute you are looking for, you can contact us athelpdesk@cp-commerce.comfor more information.
- You should now see the following table (you may or may not have the am_giftcard_prices or other attribute codes!):
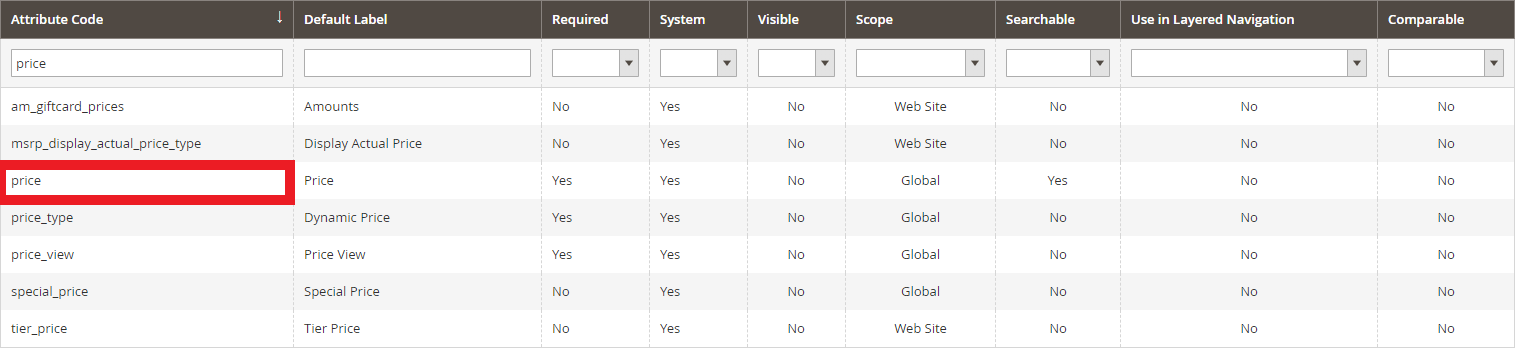 Click on the row that has the exact code you are looking for in the left-most column. In theexampleabove, we searched forpriceand will click on the attribute code with the name that matches it.
 - You should now be a screen similar to the one below:
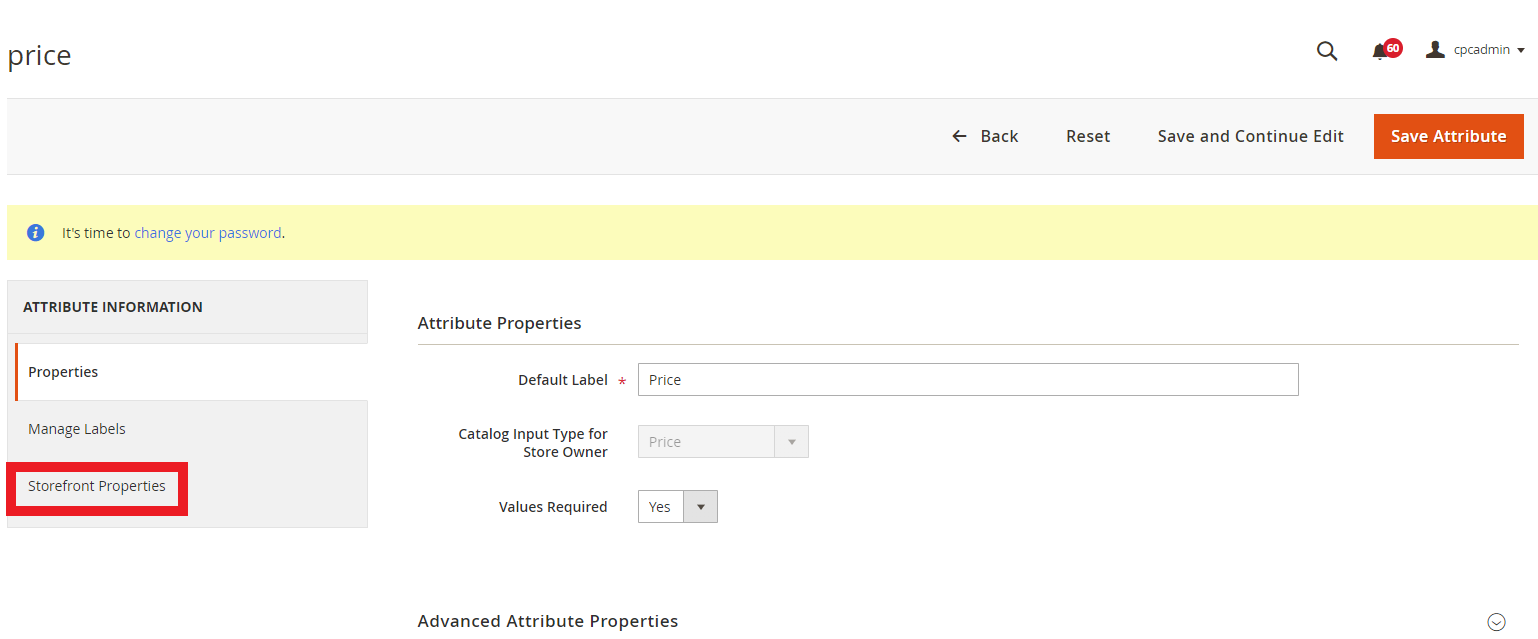 ClickStorefront Properties.
 - You should now be at a screen similar to the one below:
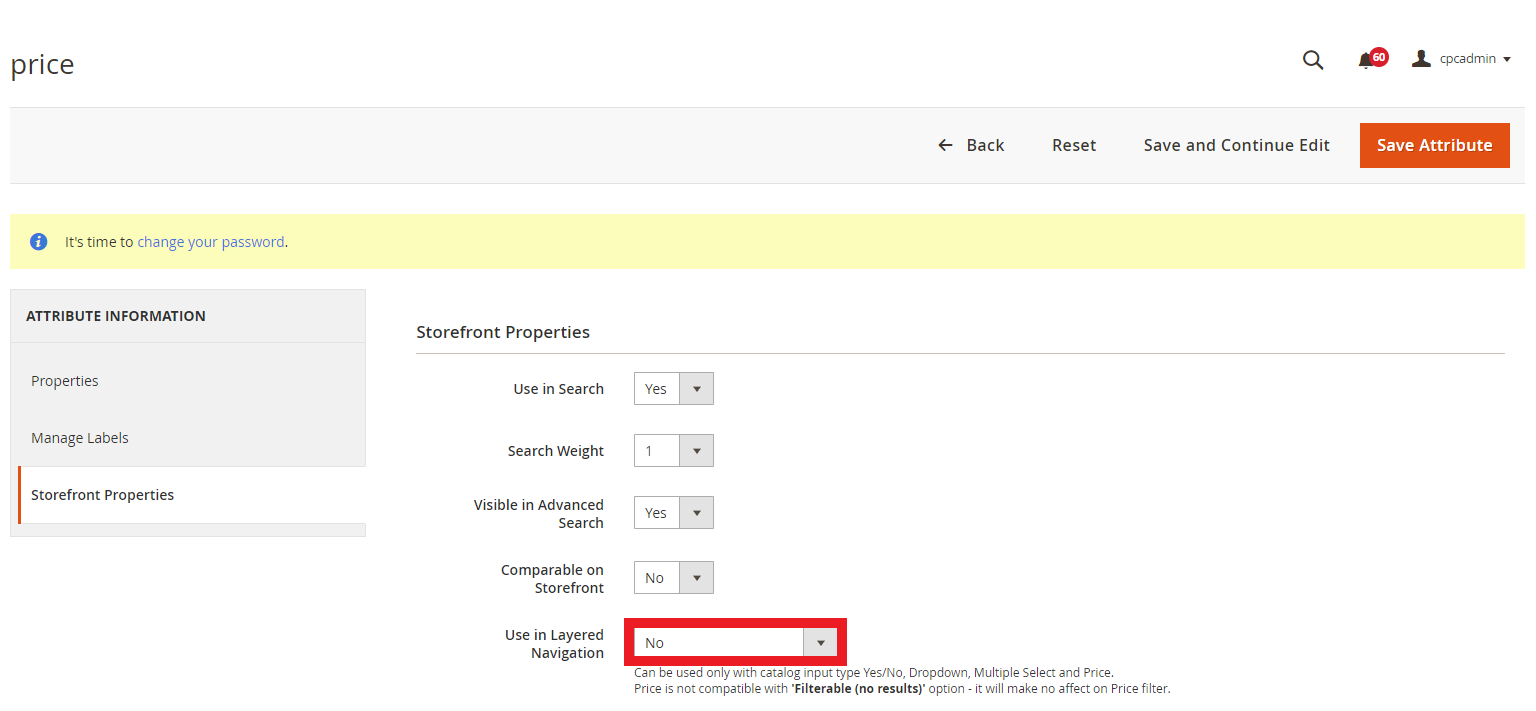 Click on thedropdown menusurrounded in red above.
 - You should see the following options:
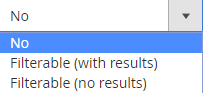
a.)No- Disables the attribute as a filter
b.)Filterable (with results)- Enables the attribute as a filteronly ifthe filter has results
c.)Filterable (no results)- Enable the attribute as a filterregardlessof if the filter has results - PressSave Attribute.

- Clear Cache.
Related articles
- Page:
- Page:
- Page:
- Page:
- Page: