How to Manage Your Matrix Rates
This article will guide you through the process of setting up or updating your matrix rate shipping method.
Step-by-step guide
- Log into the Magento Admin Panel.
- Navigate toStores>Configuration.

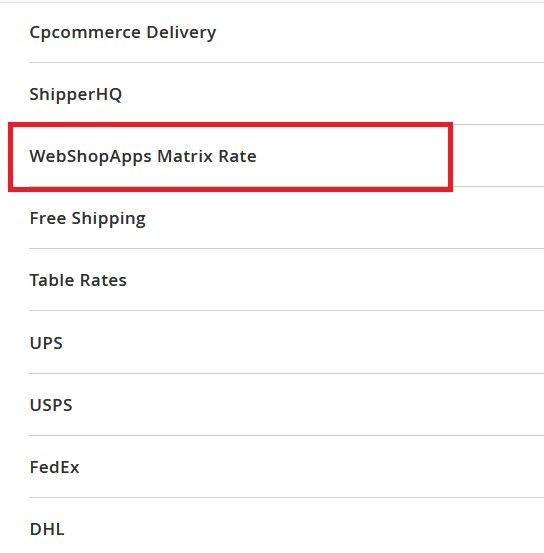
- On the left-hand side of the Configuration menu, navigate toSales>Shipping Methods

- Click on the section labeledWebShopApps Matrix Rate.
- You can enable/disable the matrix rates, change the name of the shipping method, and also change the condition you want to use to calculate the shipping rates. The Condition field is as follows:
- Weight vs. Destination: checks the total weight (lbs or kg) of the items in the cart
- Order Subtotal vs. Destination: checks the subtotal of the entire cart
- # of Items vs. Destination: checks the number of items in the cart
- Weight vs. Destination: checks the total weight (lbs or kg) of the items in the cart
- Order Subtotal vs. Destination is generally used in most cases but feel free to change the condition to one more suitable for your own store.
- You can then save your settings with the "Save Config" button on the top-right of the page. You would then need to refresh the cache for the changes to be active.
- How to refresh the cache can be found here:https://support.cp-commerce.com/a/solutions/articles/72000292651
- How to refresh the cache can be found here:https://support.cp-commerce.com/a/solutions/articles/72000292651
- Next, navigate toMatrix Rate Manager>Manage Rates
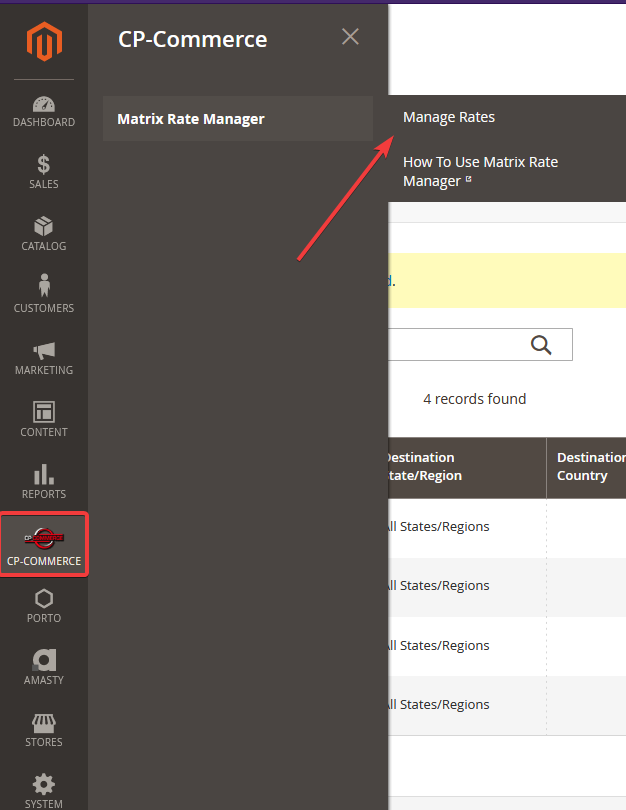
- Here you can view your rates, make edits, delete unwanted rates, and upload new rates.
- Export Existing Rates
- Use the Export Rates button to export your current rates as a CSV.
- Upload New Rates
- If you have no existing rates, download the start file at this link:Matrix Rate Manager Starter File. You will need Excel to make changes to the CSV file.
- The file has 11 columns. The columns are explained below:
- website_id: The website id for your store. If you have only one online store, this will always be 1.
- dest_country_id: This isthe country for the rate. This field is required.
- You must use the two-letter code for the country in this field. Ex. United States would beUS, Canada isCA, Brazil isBR, etc.
- A list of country codes can be foundhere.
- dest_region_id: This is the state/region you want the rate applied to.
- You must use the full name of the state/region.
- Leave this field blank if you wanted the rate to apply to all states/regions in the country.
- dest_city: The city for the rate.
- You must use the full city name in this field. Ex. New York, Buffalo, Chicago, etc.
- If you want it to apply to all cities, use the asterisk ( * ) symbol.
- dest_zip: Zip code for the rate.
- If you want it to apply to all zip codes, use the asterisk ( * ) symbol.
- dest_zip_to: To add a range of zip codes.
- If you wanted to use a range of zip codes, thedest_zipfield needs to be filled with a zip code.
- If you want to apply to all zip codes, use the asterisk ( * ) symbol.
- condition_name: This is the condition you want to be applied to the rate.
- There are only 3 options accepted by the file importer. These are as follows:
- package_weight
- package_value
- package_qty
- package_weight: Use if you selectedWeight vs. Destination in your matrix rate settings.
- package_value: Use if you selectedOrder Subtotal vs. Destinationin your matrix rate settings.
- package_qty: Use if you selected# of Items vs. Destinationin your matrix rate settings.
- package_weight: Use if you selectedWeight vs. Destination in your matrix rate settings.
- package_weight
- There are only 3 options accepted by the file importer. These are as follows:
- condition_from_value: The starting range for your condition.
- condition_to_value: The end of the range for your condition
- For example, if you are using Weight vs. Destination in your matrix rates settings, you could set thecondition_from_valueto 1 and thecondition_to_valueto 10. This means that the rate would only apply to an order with a weight between 1 and 10 pounds.
- price: The cost to the customer.
- shipping_method: The name of the rate. This is shown when the customer is checking out.
- If you have no existing rates, download the start file at this link:Matrix Rate Manager Starter File. You will need Excel to make changes to the CSV file.
- Edit a Rate
- To edit an existing rate, click on the rate to bring up the inline editor.
- You can then make changes and save them instantly
- Delete a Rate
- To delete an unwanted rate, select the checkbox next to rate.
- Next, click the Actions drop-down at the top-left of the page and click delete.

Related articles
https://docs.shipperhq.com/category/webshopapps-extensions/matrixrates/
Related Articles
USPS Shipping Method
Sections: DescriptionSetup Description This article will guide you on how to enable the USPS shipping method for your webstore and allow your customers to select USPS at checkout. Magento Instruction:here. Setup Create a USPS account. Visithere. Fill ...CP-Commerce Slideshow
This module allows the user to create and edit their slideshow within their Magento Admin Panel. Once installed you will see two pages: Manage Slideshows, and Manage Slides. Manage Slideshows Manage Slides Add/Edit Content NOTE: If you do NOT have ...How to Enable or Disable a Layered Navigation Attribute
This article describes how to enable or disable a Layered Navigation Attribute on your Catalog Pages. Layered Navigation adds the attributes on the side of the catalog pages that products can be filtered by such as price, brand, and other attributes. ...UPS Shipping Method
TABLE OF CONTENTS Description Setup Description This article will guide you on how to enable the UPS shipping method for your webstore and allow your customers to select UPS at checkout. Magento Instructions:here External Instructions:here Setup You ...FedEx Shipping Method
Sections Description Setup Description This article will guide you on how to enable the FedEx shipping method for your webstore and allow your customers to select FedEx at checkout. Magento Instructions:here External Instructions:here Setup We ...