CP-Commerce Slideshow
This module allows the user to create and edit their slideshow within their Magento Admin Panel. Once installed you will see two pages: Manage Slideshows, and Manage Slides.
- NOTE: If you do NOT have the CPCommerce Slideshow installed, please go here: Magento 2: How to Add/Modify Homepage Slideshow - Porto
Manage Slideshows
This page allows you to create slideshows or edit existing slideshows.
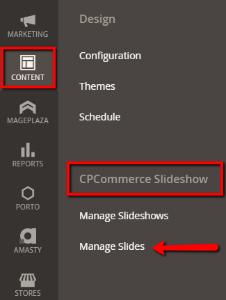
Navigate to Content> CPCommerce Slideshow> Manage Slideshows

To create a slide show click "Add New Slideshow"
To edit an existing slideshow click the select to the right of the slideshow you wish to edit. Then choose "Edit".
General Information Section
- Name: Anything you want it to be.
- Type: The style of the slideshow.
- Enabled: If on it will show on the website. If off it will not show on the website.
Design Section
- Text Color: The text color for the whole slideshow.
Slider Settings Section (Wont Show Unless you Save your Slideshow)
- Enable Slider: Enables the owl carousel settings.
- Slides Per Page: The number of items you want to see on the screen
- Autoplay: Enables automatic slide rotation.
- Autoplay Timeout: Autoplay interval timeout in milliseconds - e.g. 5000 = 5 seconds.
- Autoplay Hover Pause: Pause on mouse hover.
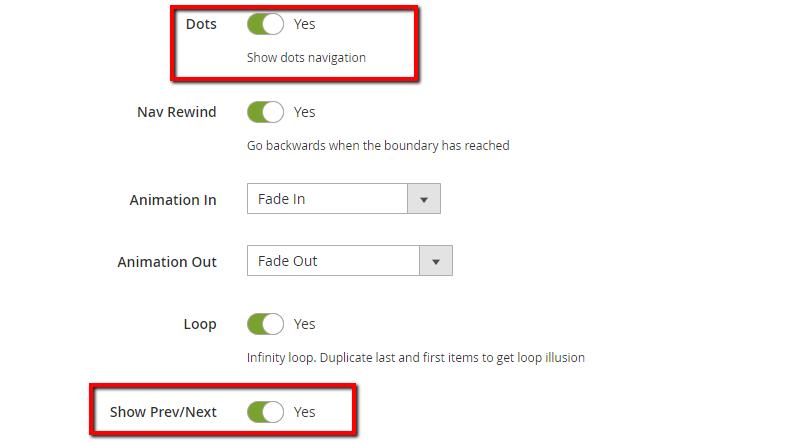
- Dots: Show dots navigation
- Nav Rewind: Go backwards when the boundary has reached.
- Animation In and Out: How the slides will appear when scrolling through the slideshow.
- Loop: Infinity loop. Duplicate last and first items to get loop illusion
- Show Prev/Next: Show the Prev/Next arrows.
Example:
This specific Slideshow Type hides the dots, but will show the next and previous arrows.
As you can also see is the content section has the button shown.


Advanced Settings Section (Wont Show Unless you Save your Slideshow)
- Prev Arrow Html: Html for the icons for your previous arrow.
- Next Arrow Html: Html for the icons for your next arrow.
- Custom CSS: Code to style your slideshow.
How To Use Section
Shows you what code you need to input into your page to display the slideshow.
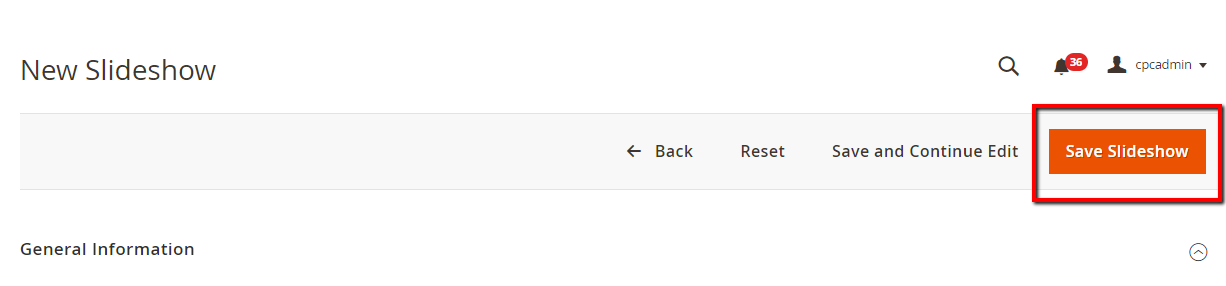
Once you have filled out everything make sure to save by Clicking Save Slideshow.
Manage Slides
This page is where the user cancreate slides and assign them to a slideshow.
There are two ways to get to this page.
- Navigate to Content>CPCommerce Slideshow>Manage Slides
- WithinManage Slideshowsclick select on the right of the slideshow you wish to add slides to and click Manage Slides.
To create a slide click "Add New Slide" in the top right corner.

To edit an existing slide click select on the slide you wish to edit and choose edit.
General Information Section
- Slideshow: What slideshow this slide will be on.
- Enabled: If on it will show in the slideshow. If off it will not show in the slideshow.
- Slide Link: Link to the page you want the slide to take you too.
- EX:https://www.example.com/apparel/shirt.html
- Enter the blue in this input.
If you have this input filled. You cannot have a button on the slide. If you want a button this input must be blank.
Primary Image Section
- Primary Image: Upload the image to be displayed on this slide.
- If there is a recommended image size try to get as close as possible or you will experience distortion or stretching of the image.
- Image Horizontal Position: Where the image will be placed in the horizontal axis. (Left to Right)
- Image Vertical Position: Where the image will be placed in the vertical axis (Top to Bottom)
- Image Repeat: How the image will be repeated on the slide.
- Image Size: How the image size will be fit to the slide.
Example:
The image Horizontal Position is set to 71%. Lower percentages will have the image show more to the left.
Higher percentages will mean further to the right.


Secondary Image Section
- Secondary Image: Allows for multiple images on the same slide (Only allowed in certain slideshow types).
Design Section
- Text Color: Text Color of the slide.
Content (Wont show unless you save the slide)
- Here is where you can add and edit content sections for this slide.
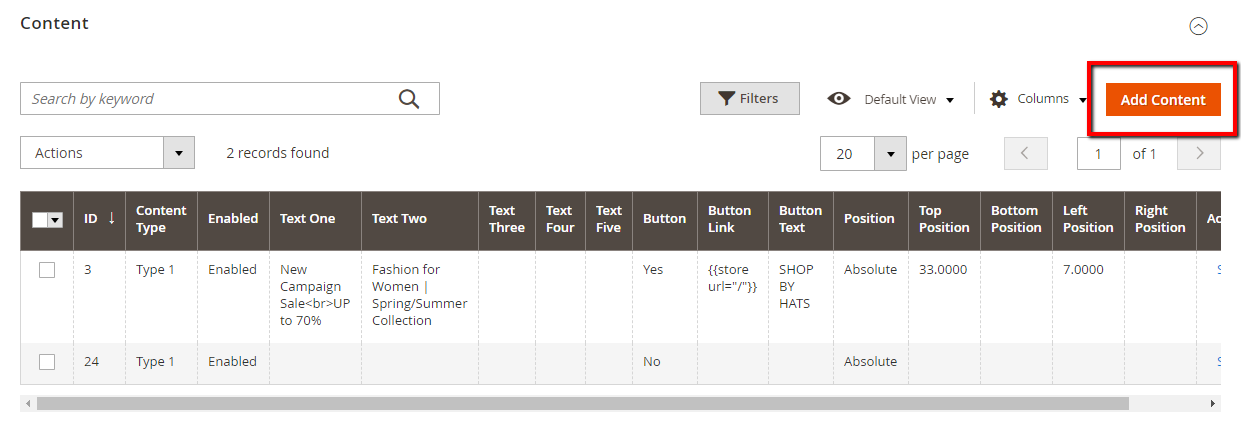
- To create a new content section click "Add Content"
- To edit an existing content section click the select on the right of the content section you wish to edit and choose edit.
- Do not leave an empty content section on a slide. Please delete the content section if it is empty or add text to that content section.
Add/Edit Content
This page will allow you to edit the content section for a slide.
General Information Section
- Content Type: The style of the content.
- Enabled: If on it will show on the slide. If off it will not show on the slide.
Text Section
- This section will vary based on what Content Type you chose.
- There will be text inputs and a color input per text input.
Button Section
- If you want a button, the slide link field must be blank. If you want the slide link to work the button's Show Button field must be off.

- Show Button: If on there will be a button on the slide. If off there will be no button.
- Button Link: Where the button will take you. To add a link to a button:
- On the website go to the page you wish the button to take you too and copy the whole URL. EX:https://www.example.com/apparel/shirt.html
- Copy everything after the base URL and put it in the Button Link input. (Base URL is shown in red. Everything after the base URL is shown in blue).
- The button link input should look similar to this (text in blue will look different): {{store url='/apparel/shirt.html'}}
- Button Text: The text that will display on the button
- Colors: The colors for the button and when the button is hovered over.
Design Section
- Background Color: The background color of the content section.
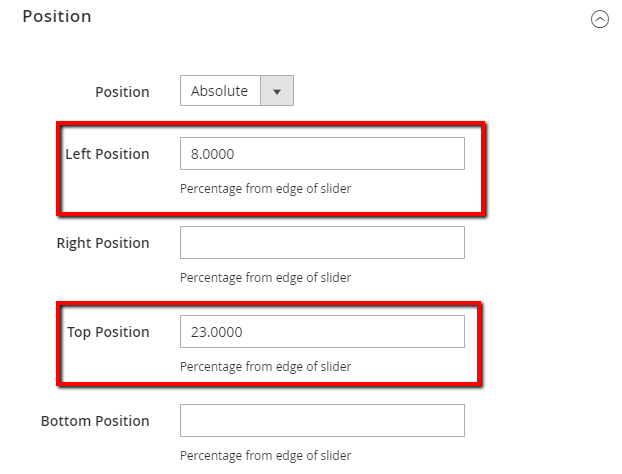
Position Section
- Position: How the content will be positioned.
- Left, Right, Top, Bottom Position: How far the section is from each side.
- EX: Left Position 10. Means the content section will be 10% away from the left side.
Advanced Section
- Custom CSS: Custom code for the looks of the slide.
Example:
This content section uses the positioning inputs. Left Position: 8 means 8% from the left edge of the slider.
For the button link input, you will want to replace the / with the page of your choice. How to do this is explained above in the Button Section: Button Link instructions.
The hover colors are how the button will look while the mouse is hovering over the button.


Once you are done filling this out click "Save Content" in the top right.
Click "Save Slide" in the top right.
Once you have a slideshow created with slides you need toclear your cache.
Related Articles
How to Add/Modify Homepage Slideshow - Porto
This article covers the basics of adding and modifying the slide contents on your homepage. Please note that this tutorial only applies to Porto Themes actively installed. Your slider(s) on the homepage is powered by a JQuery plugin calledOWL ...What is CP-Commerce?
CP-Commerce is a hosted integration platform that allows businesses to link their brick and mortar ERP system to an online ecommerce website. Currently the integration supports NCR Counterpoint 8.4.6+ as the brick and mortar ERP system and Magento ...CP-Commerce Catalog Mode
The CP-Commerce Catalog Mode module allows you to disable the cart and checkout on the site. This can be helpful if your store has a temporary closing, or does not take sales. Admin Configuration Differences Admin Configuration In Stores> ...Guide to Getting Started with CP-Commerce
We're glad you've decided to get started on your journey with CP-Commerce. Whether you're new to the Ecommerce world, or finally connecting your already successful Ecommerce website, we're here to help you prepare so we can get things running ...Event Tickets: Create Your Event with CP-Commerce
Overview We are excited to help you create your online event and start selling tickets through the webstore. In this article, we will outline the flow of how your events will sync between platforms and the general steps to create your events. With ...